

How To Deactivate Facebook Account On Android App
Last Updated on March 7, 2021 by Bestusefultips
Simple and easy ways to delete or deactivate the Facebook account in the Android app without permanently delete. You can temporarily deactivate or automatically reactivate your account in 1 to 7 days. You can reactivate a Facebook account in android at any time by logging in with your email and password. When deactivating your Facebook account, it will disable your profile and remove your name and photo from most things you've shared on Facebook. Some of the information may still be visible to others, such as your name in their friend's list and messages you sent. Also, delete all Facebook pages and groups created by you.
Facebook is one of the most used instant messaging apps on a smartphone such as Android, iPhone, Blackberry, and more. Using this android app for Facebook, you can stay in touch with your friends and family. Follow the below-given steps to temporarily deactivate the Facebook Messenger app on the Android phone.
Read Also:
- How to change Facebook cover photo Android
- How to change the Facebook password using the Android app
How to Deactivate the Facebook Account & Facebook Messenger in Android
Let see the one by one method to deactivate your Facebook messenger account and Facebook App account on your Android devices.
Temporary Deactivate Facebook Messenger 2020 on Android
Step 1: Open the Facebook messenger app in your Android devices.
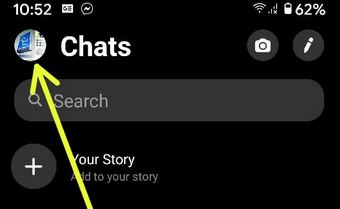
Step 2: Tap the Profile icon at the top right corner.
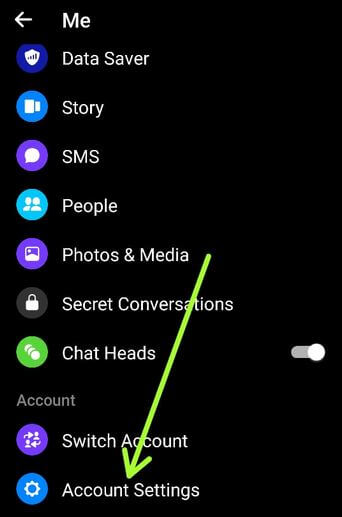
Step 3: Scroll down and tap Account settings under the Account section.
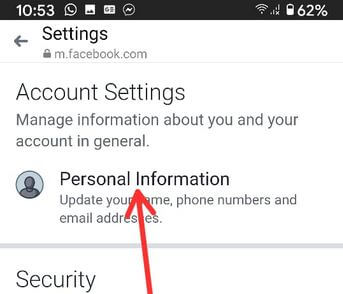
Step 4: Tap Personal information under the account settings.
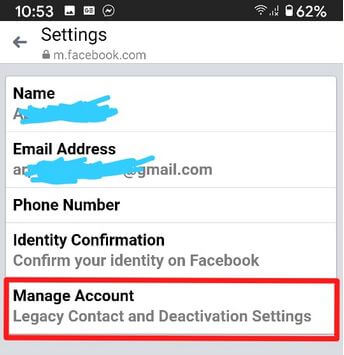
Step 5: Tap Manage Account.

Step 6: Tap Deactivate.
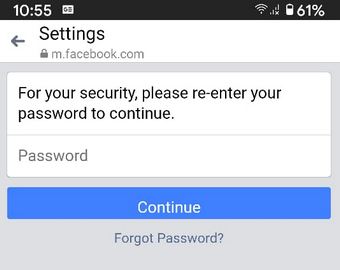
Step 7: Enter your Password and tap Continue.
Using Facebook App
Step 1: Open Facebook app in your android phone or tablet & log in.
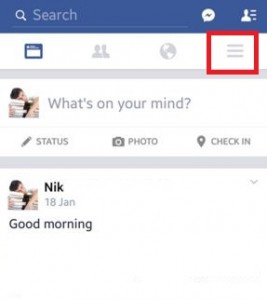
Step 2: Tap on Three horizontal lines.
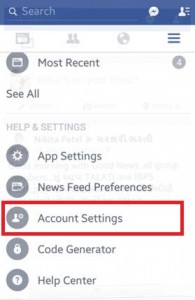
Step 3: Under the help & settings category, tap on Account Settings.
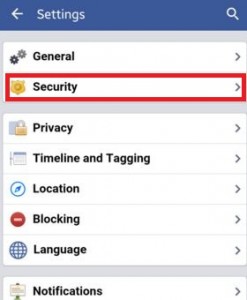
Step 4: Tap on Security.
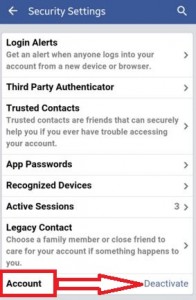
Step 5: Tap on Deactivate.
When you tap on deactivate, you can see this message: For your security, please re-enter your password to continue.
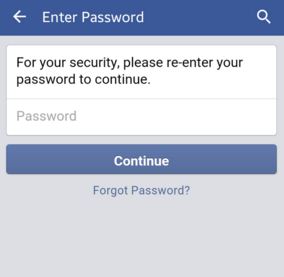
Step 6: Enter facebook login password in-box & tap on Continue.
Now you can see the message: Are you sure you want to deactivate your account?

Step 7: Choose from the given options to let us know why you are deactivating the Facebook account.
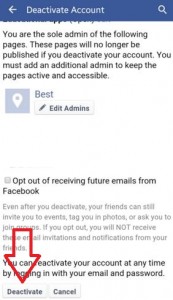
Step 8: Tap on Deactivate.
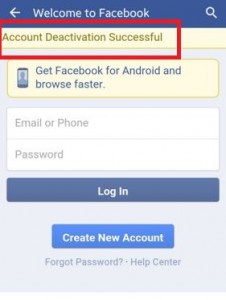
You can see the above screen on your android mobile or tablet. Now deactivate the Facebook account in the android app.
Did you find the above process to deactivate the Facebook account in the android app useful? If you're having problems implementing this, don't hesitate to let me know on the below comment box and connect with us for daily updates!
How To Deactivate Facebook Account On Android App
Source: https://www.bestusefultips.com/how-to-deactivate-facebook-account-in-android-app/
Posted by: parkerstol1959.blogspot.com
0 Response to "How To Deactivate Facebook Account On Android App"
Post a Comment